Family Connect is a portal that allows family members to login to a customized site that displays real time information. The community decides how much or how little each family member can view.
Give Staff Access to Family Connect
Give access to a staff member to build/customize the Family Connect site.
Click on “Select Staff” under the “HR” tab.
Select a staff member.
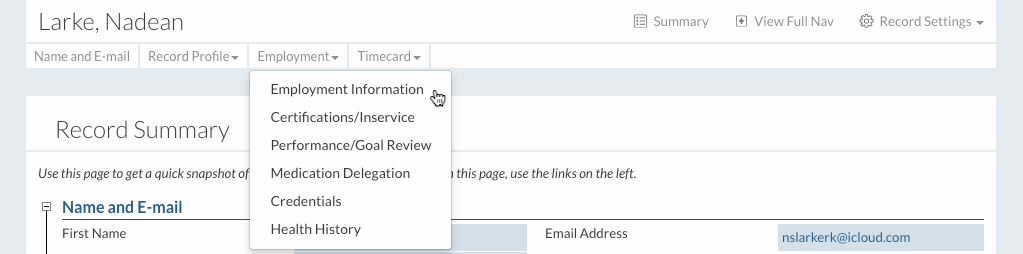
Click on “Employment Information” under the “Employment” dropdown.
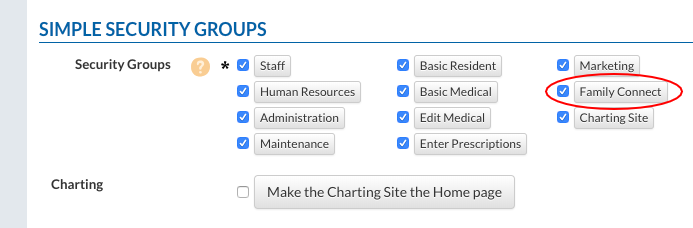
At the bottom of the form under the “Simple Security Groups” section select the “Family Connect” button.
Click the “Save” button to finish.
Set Up the Family Connect Site
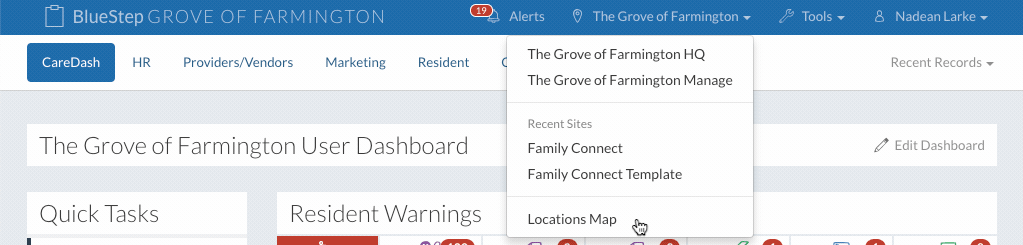
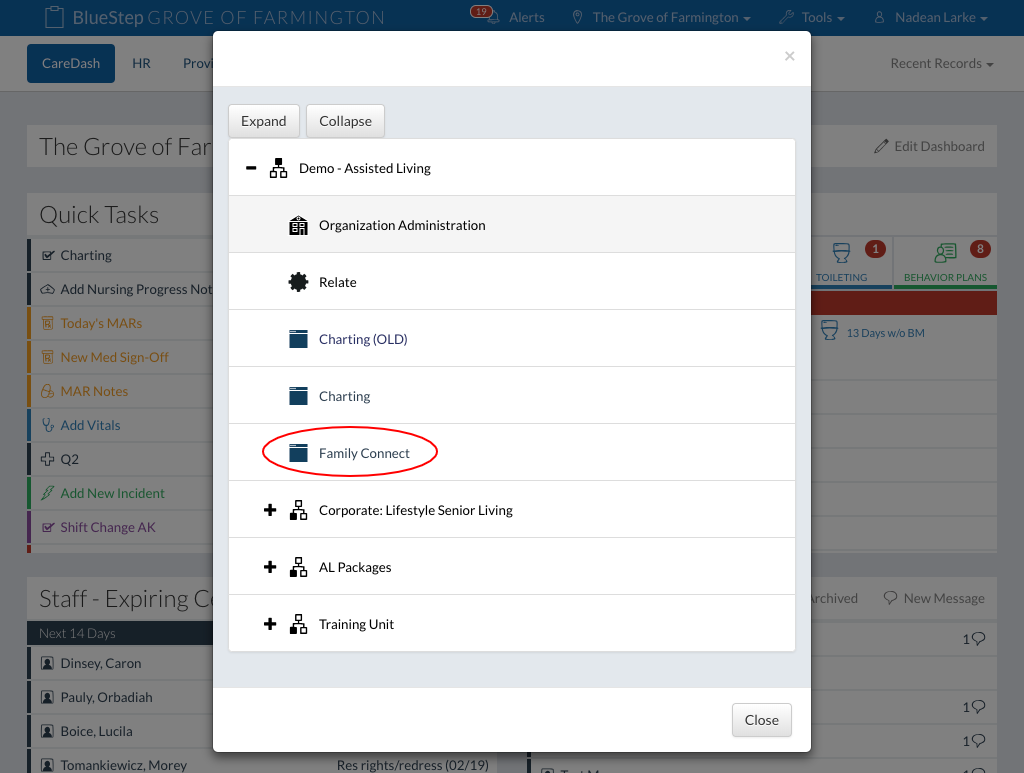
Navigate to the Family Connect site by clicking on “Locations Map” under the community name in the top header. If visited recently, Family Connect will appear under the Recent Sites section of the dropdown.
Click on the “Family Connect” link.
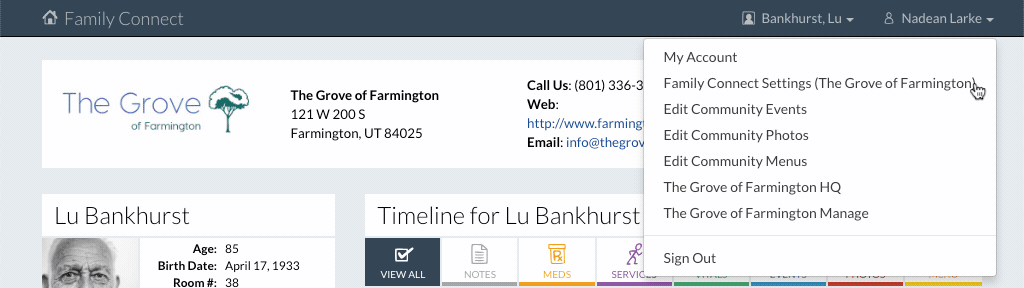
The site will need to be configured and enabled. Click on “Family Connect Settings” under the user dropdown.
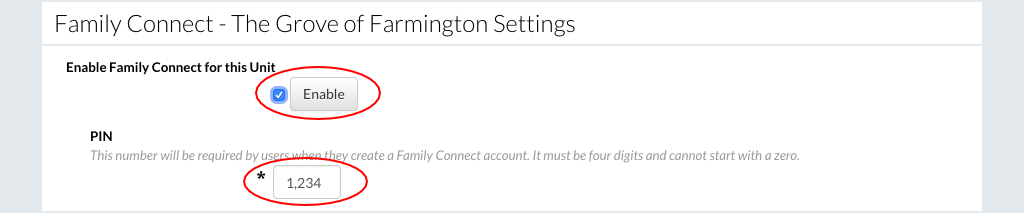
Click the “Enable” button to begin the custom setup.
Create/enter the community’s unique PIN. This number will be given to a resident’s family member to create their account. This will be the same number for all Family Connect users.
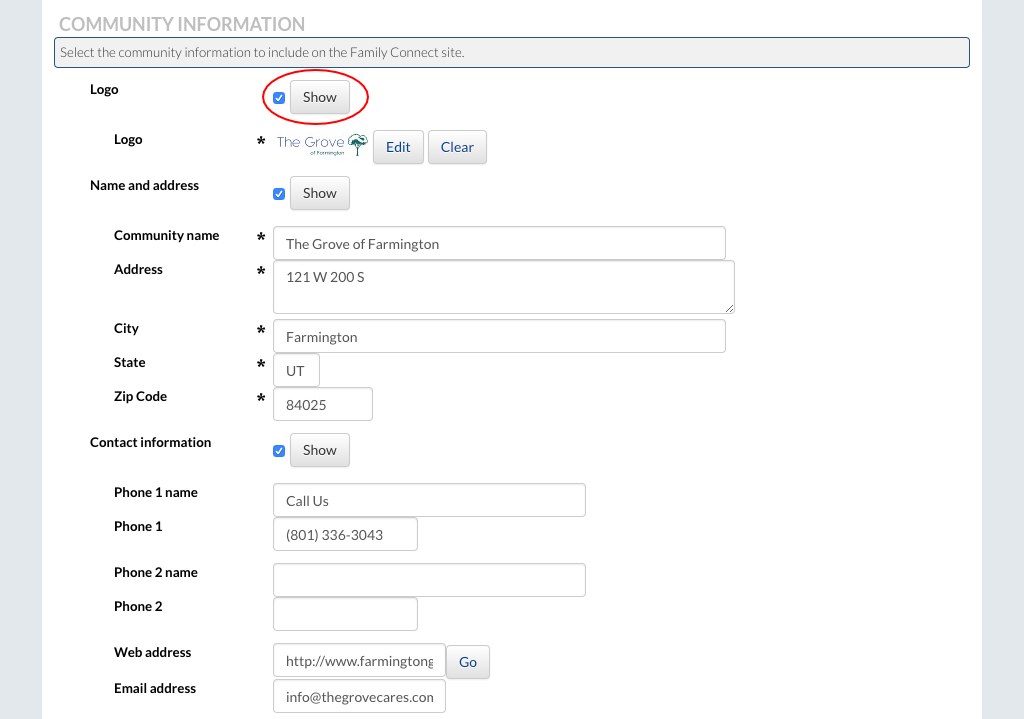
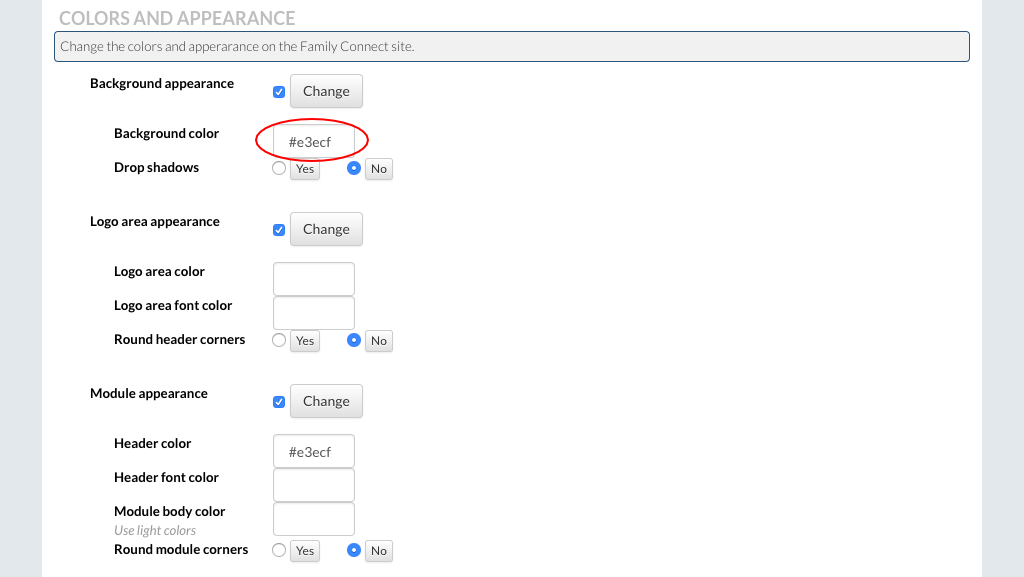
The “Community Information” section contains community information that can be entered to display on the Family Connect header. The information will be displayed if the corresponding “Show” button has been selected.
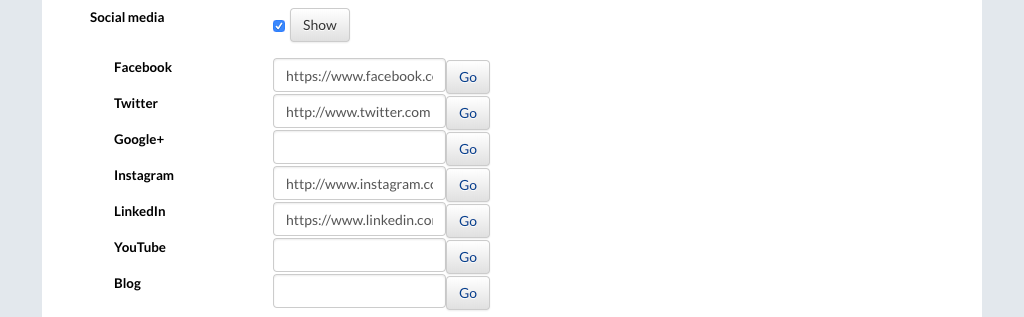
Social media icons will be displayed on the Family Connect header if they are linked, and the “Show” button is selected.
The site colors can be changed with a hex code. Click here to pick a color and find it’s hex code.
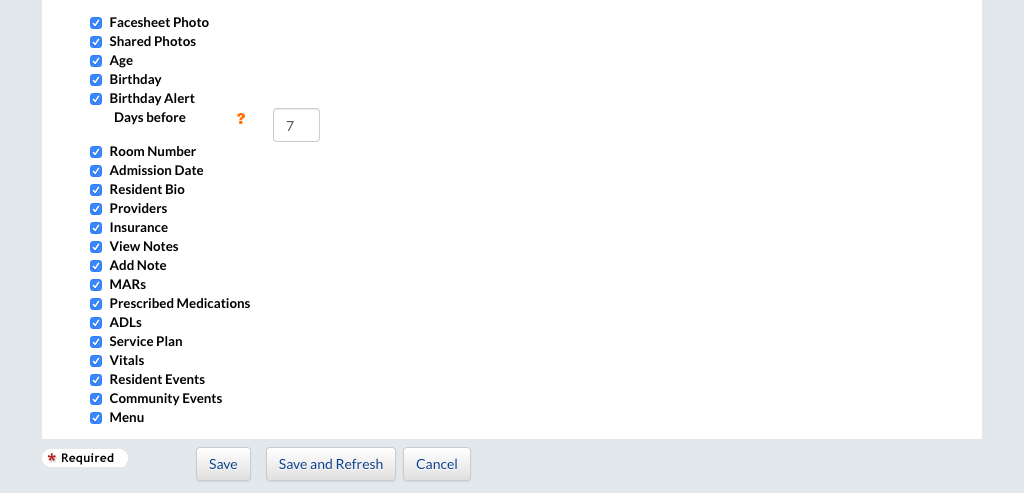
The amount of information a family member sees can be changed. Select the information you want to be visible, or deselect the information you want to be hidden. A check box indicates the information will be displayed.
Click the “Save” button to finish.
Set Up Family Member Access
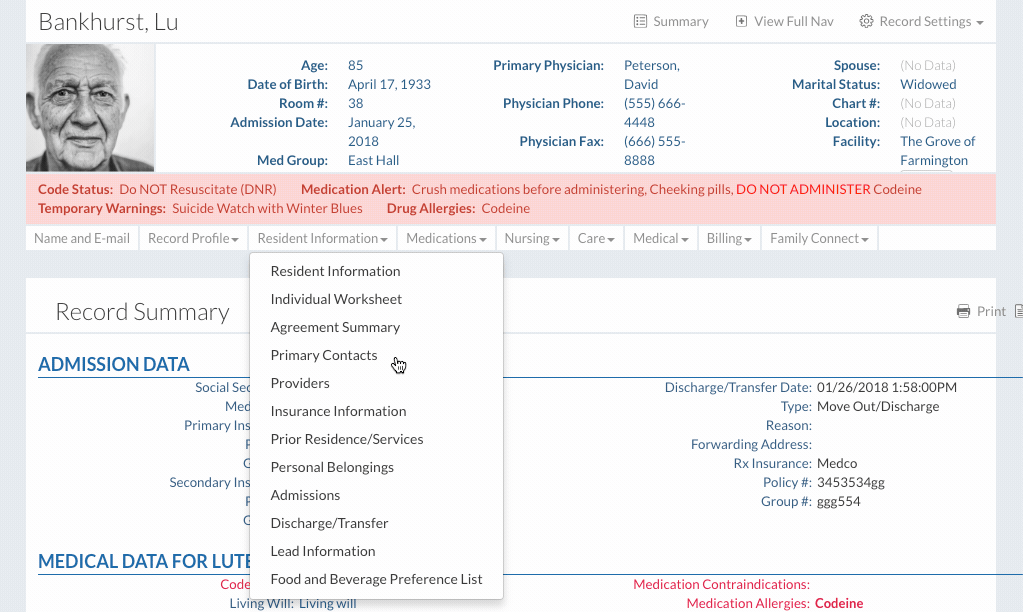
Click on “Select Resident” under the “Resident” tab.
Select a resident.
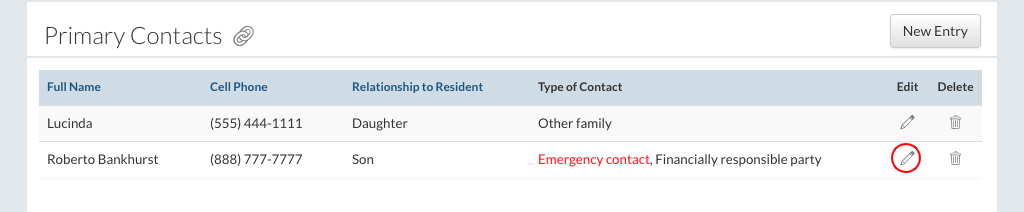
Click on “Primary Contacts” under the “Resident Information” dropdown.
Select one of the primary contacts by clicking on the edit pencil.
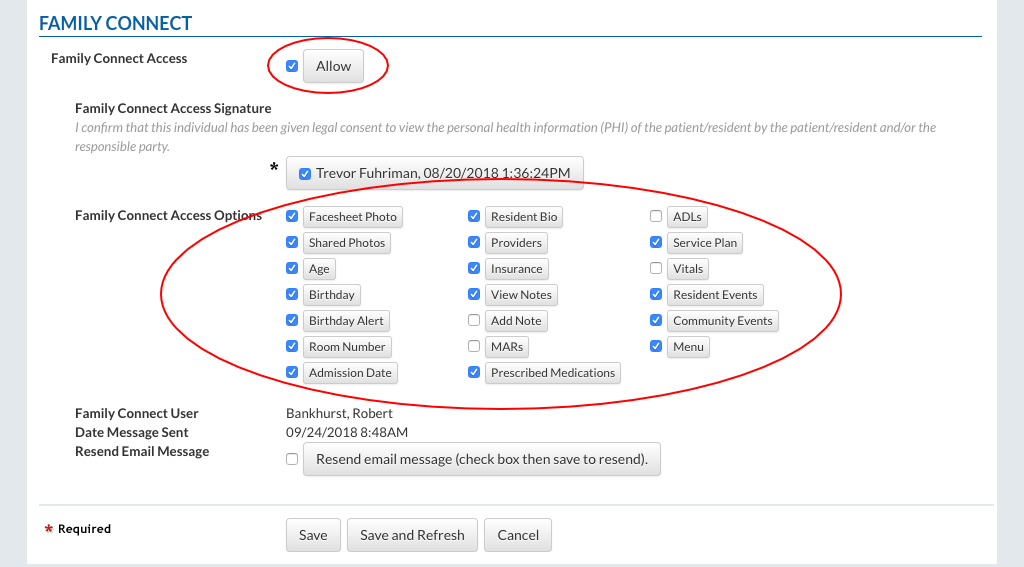
At the bottom of the form in the “Family Connect” section, select the “Allow” button.
Select or deselect any of the options to give or withhold access to the person.
Click the “Save” button to finish.
Upon saving the form, the person will receive an email giving them access to Family Connect.
The person will need to enter the community’s Family Connect PIN to set up their account.
The person will also be required to create a username and password.