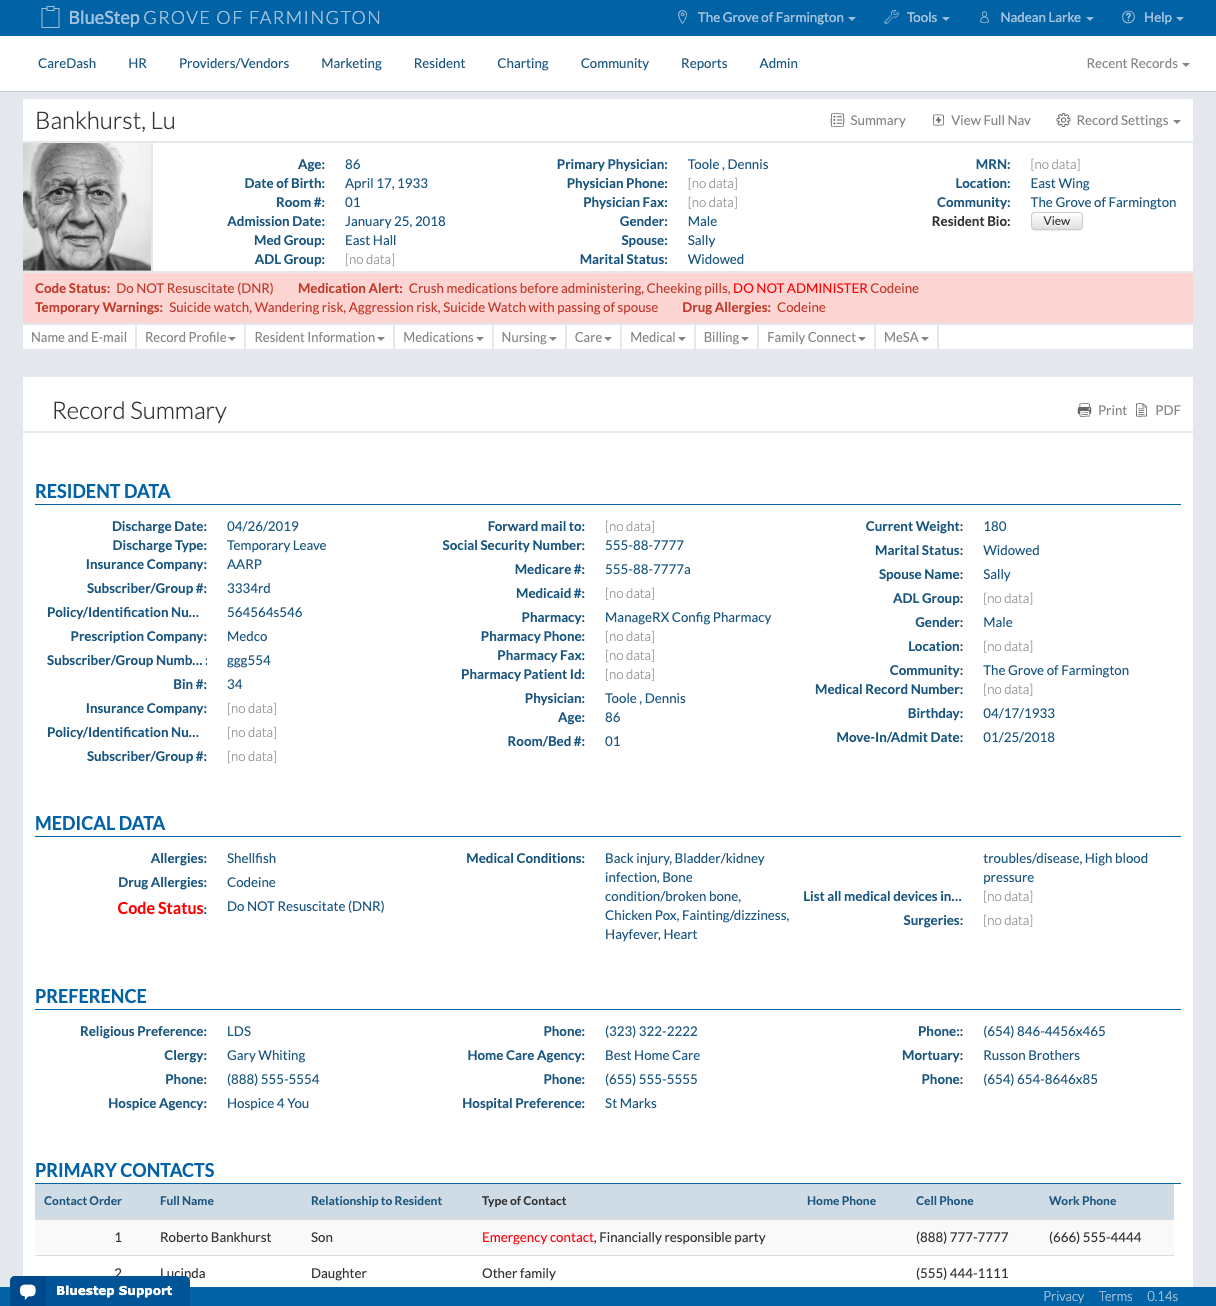
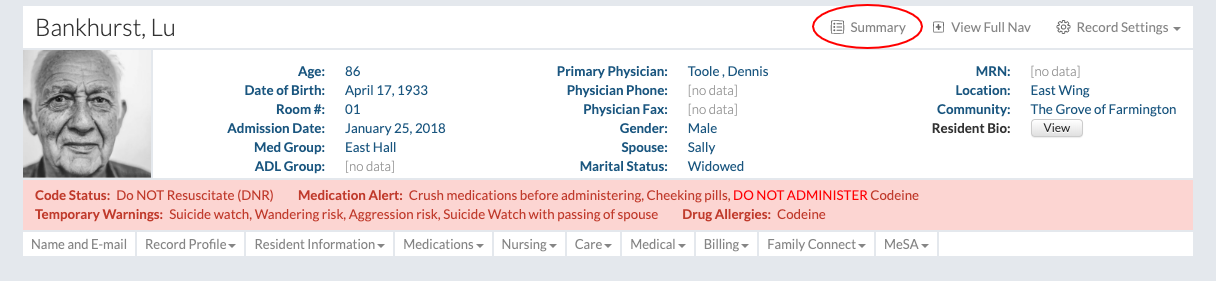
In This Help TopicSetup: Resident Record Summary/FaceSheetThe Record Summary shows all of the important resident information. This report can be printed for doctors appointments and other hospital/ER visits. It is a useful tool for entering resident information and quickly identifying information missing in the resident record. Navigate the Resident Header

Navigate the Resident Record Summary or FaceSheet
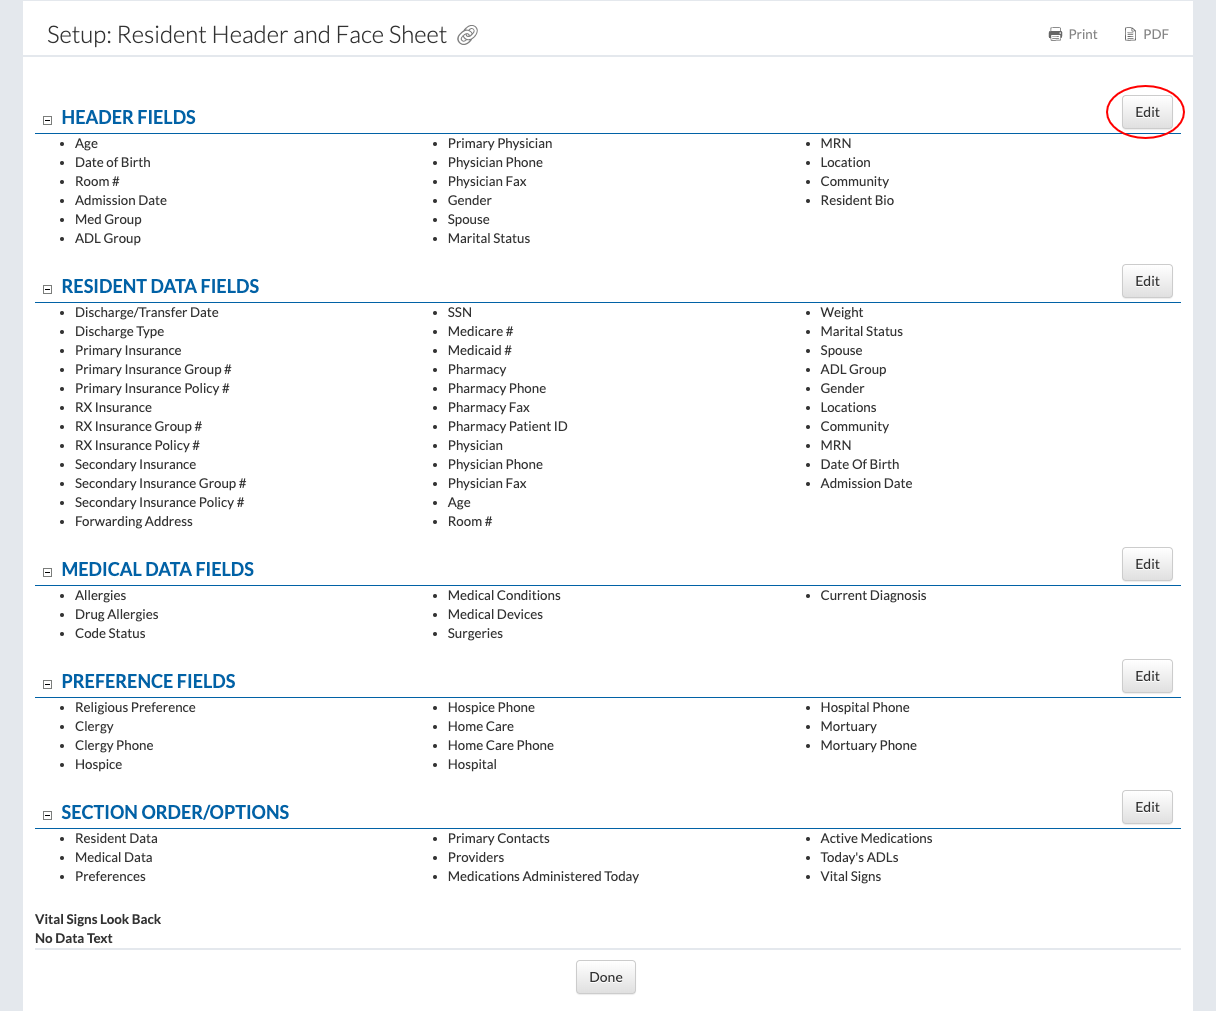
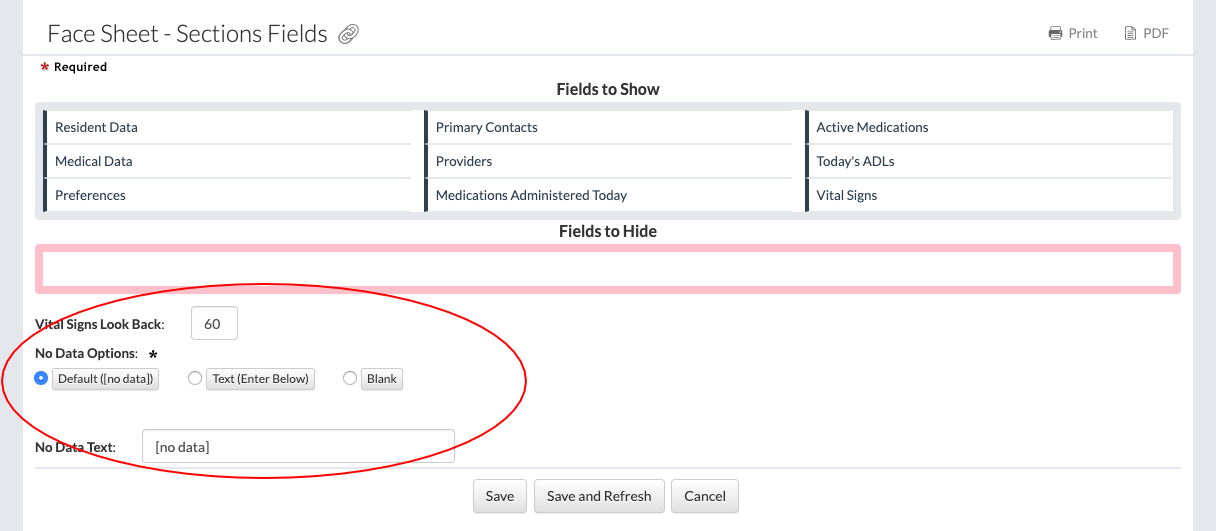
Setup the Resident Record Summary

|