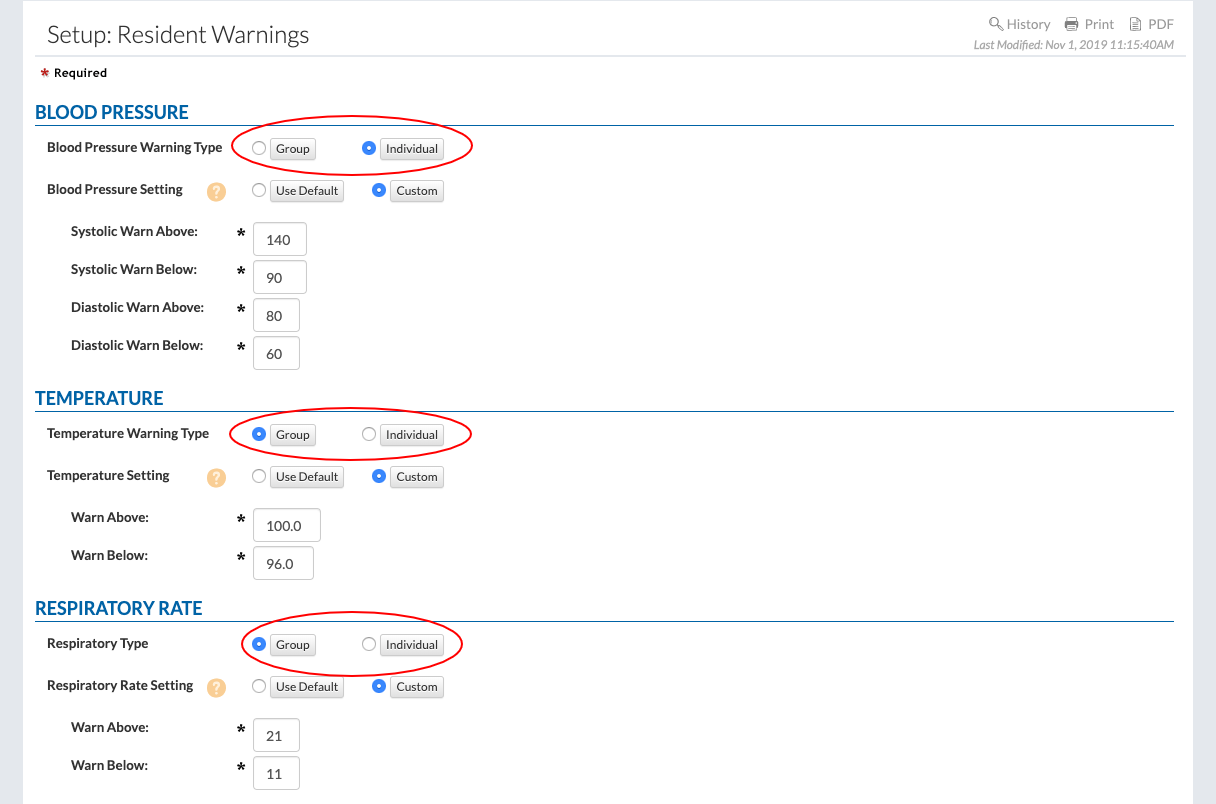
Login

Acknowledging Resident Warnings

You can manage your Resident Warning Dashboard. This training video walks you through how to set up and Acknowledge Resident Warnings at either the community level or Acknowledge per individual.

Setup the Acknowledge Feature

  1. Click on "Community Record" under the "Community" tab.
  2. Click on "Setup: Resident Warnings" under "Care" in the "Setup" dropdown.
  3. Select either "Group" or "Individual" buttons for each type of resident warning.
    • When "Group" is selected for a resident warning, whenever any staff member acknowledges a warning, the warning will drop off the Resident Warnings module for the entire community. Each staff member will see all resident warnings for the community until any staff member acknowledges the warning.
    • When "Individual" is selected for a resident warning, each staff's acknowledgement of warnings will be independent of other staff. Each staff member will see all resident warnings for the community until the warning has been acknowledged by the same staff member.
  4. Click the "Save" button to finish.

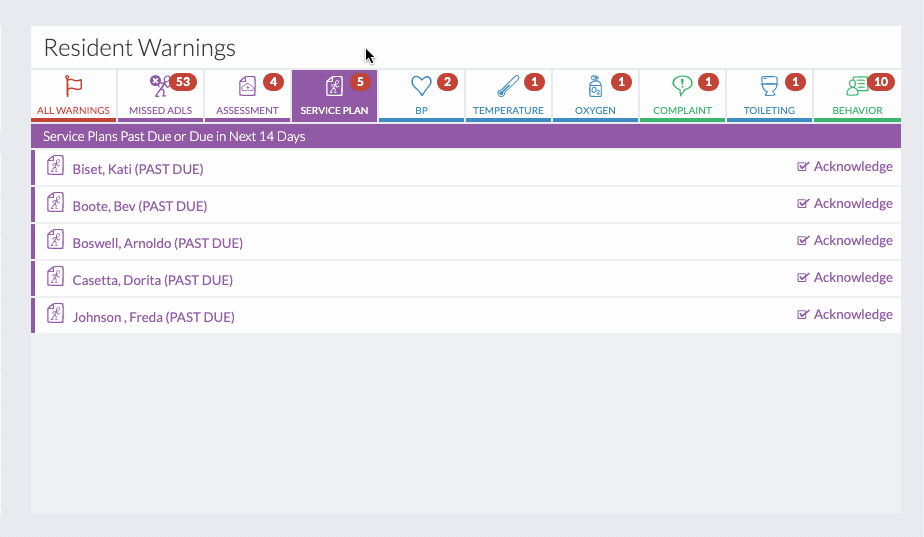
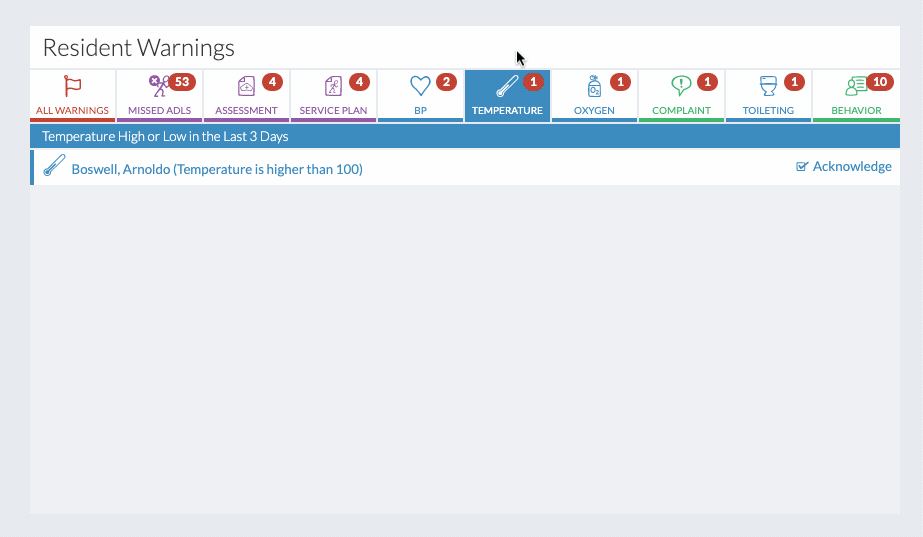
Navigate the Acknowledge Feature in the Resident Warnings Module

  • The "Acknowledge" button for each warning is available in all the tabs except the "All" tab.
  • When the "Acknowledge" button is clicked, the warning will drop off the Resident Warnings module, and the notification number will update accordingly.
    • If the "Group" setting has been selected, the warning will drop off the Resident Warnings module for every staff member in the community.
    • If the "Individual" setting has been selected, the warning will drop off the Resident Warnings module for just the logged in staff member. The warning will remain visible to other staff members in the community.
    • Remember, these settings can be set up in the Community Record. See the "Setup Acknowledgement Feature" section of this help topic for more information.
  • When a certain category has zero warnings remaining, the tab will drop off the tab bar.