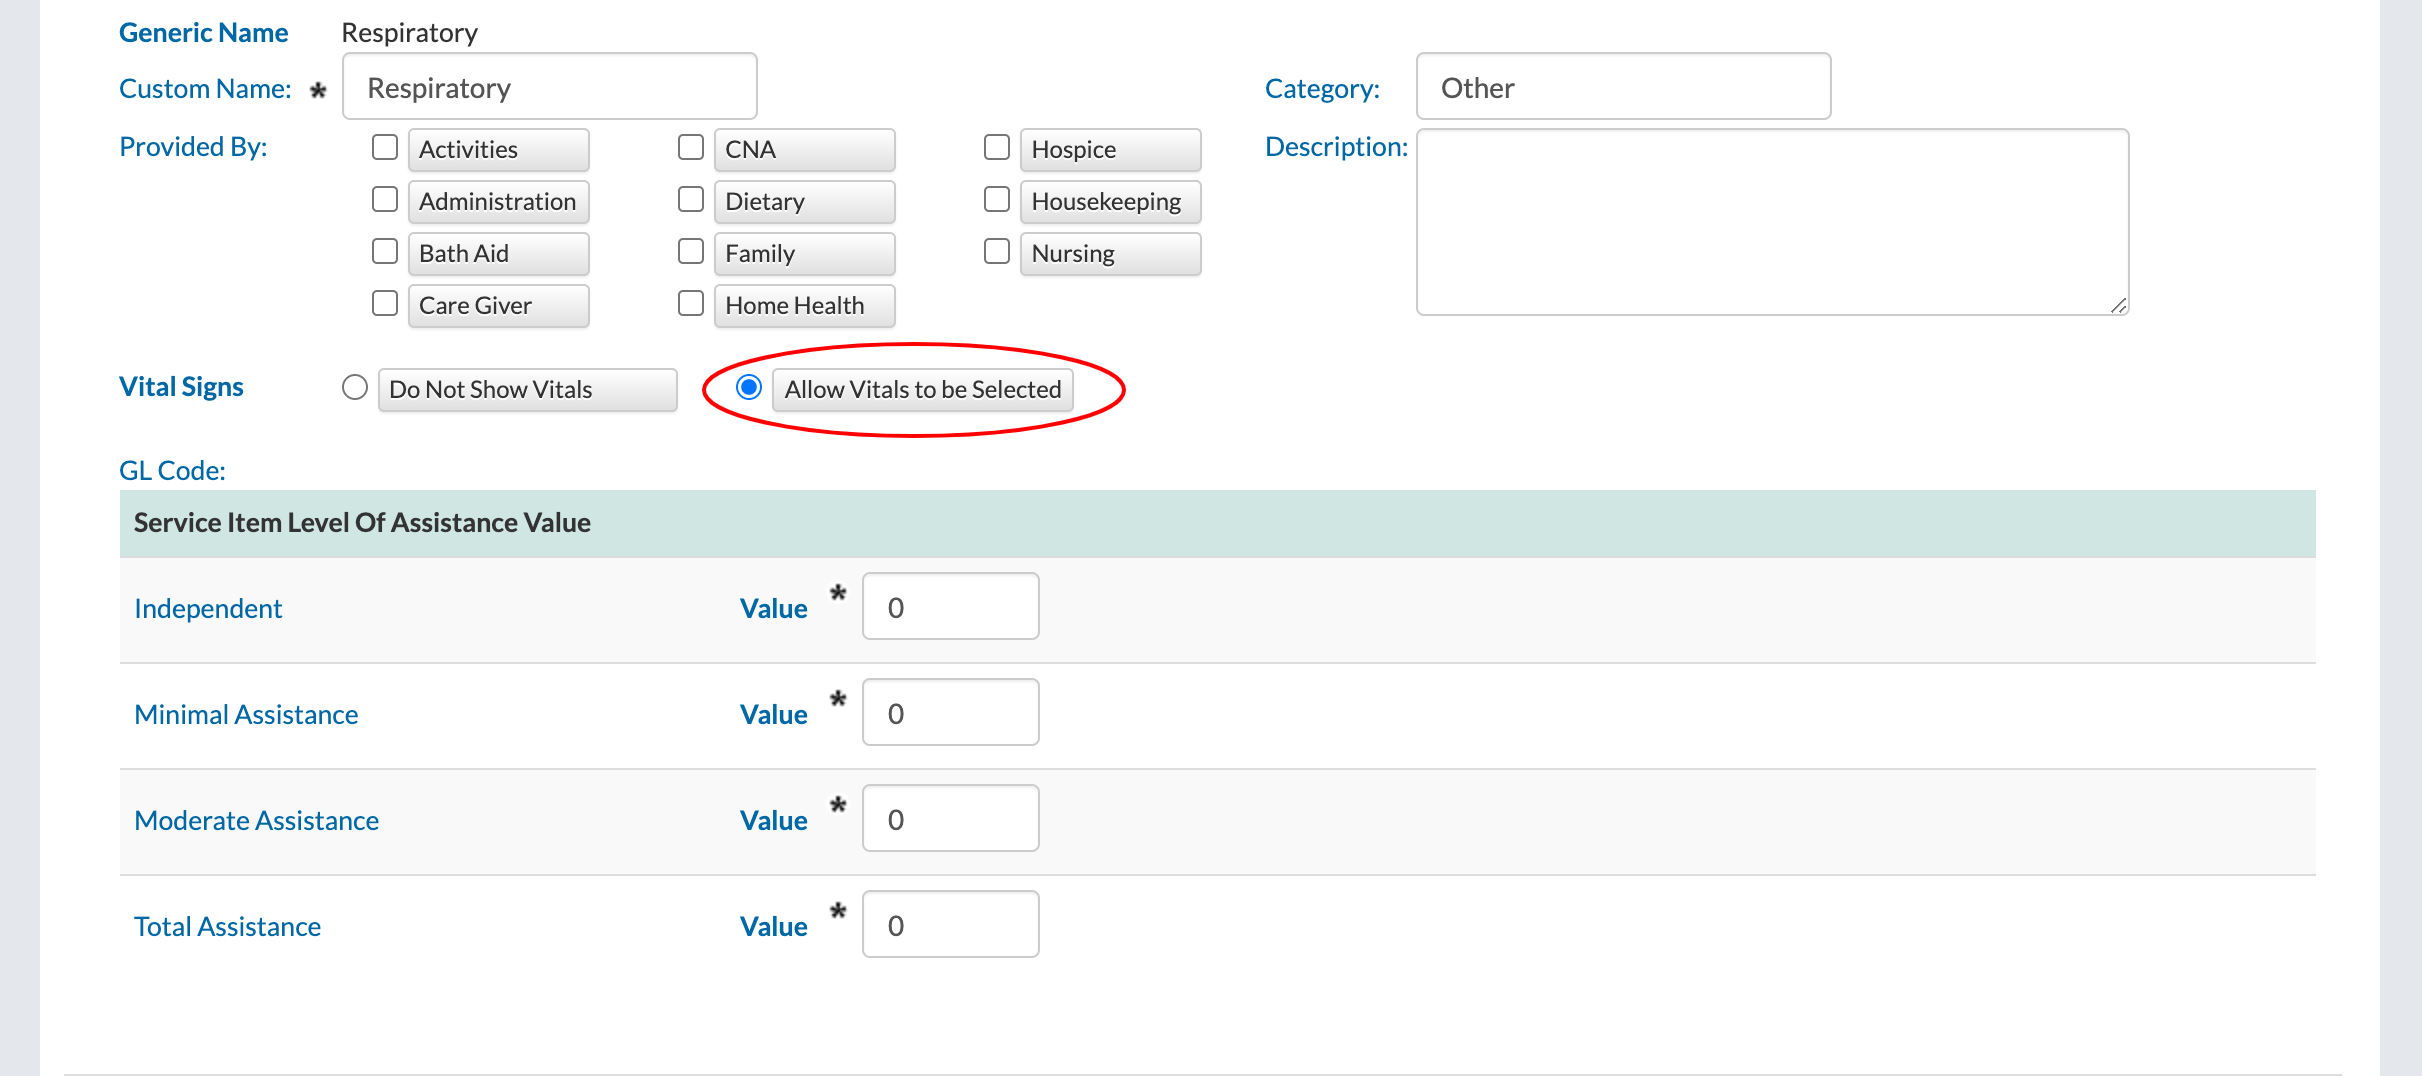
Login

Adding Vital Signs to an ADL

Learn how to add Vital Sign information to a specific ADL.

Enable Adding Vital Signs on the Community Record
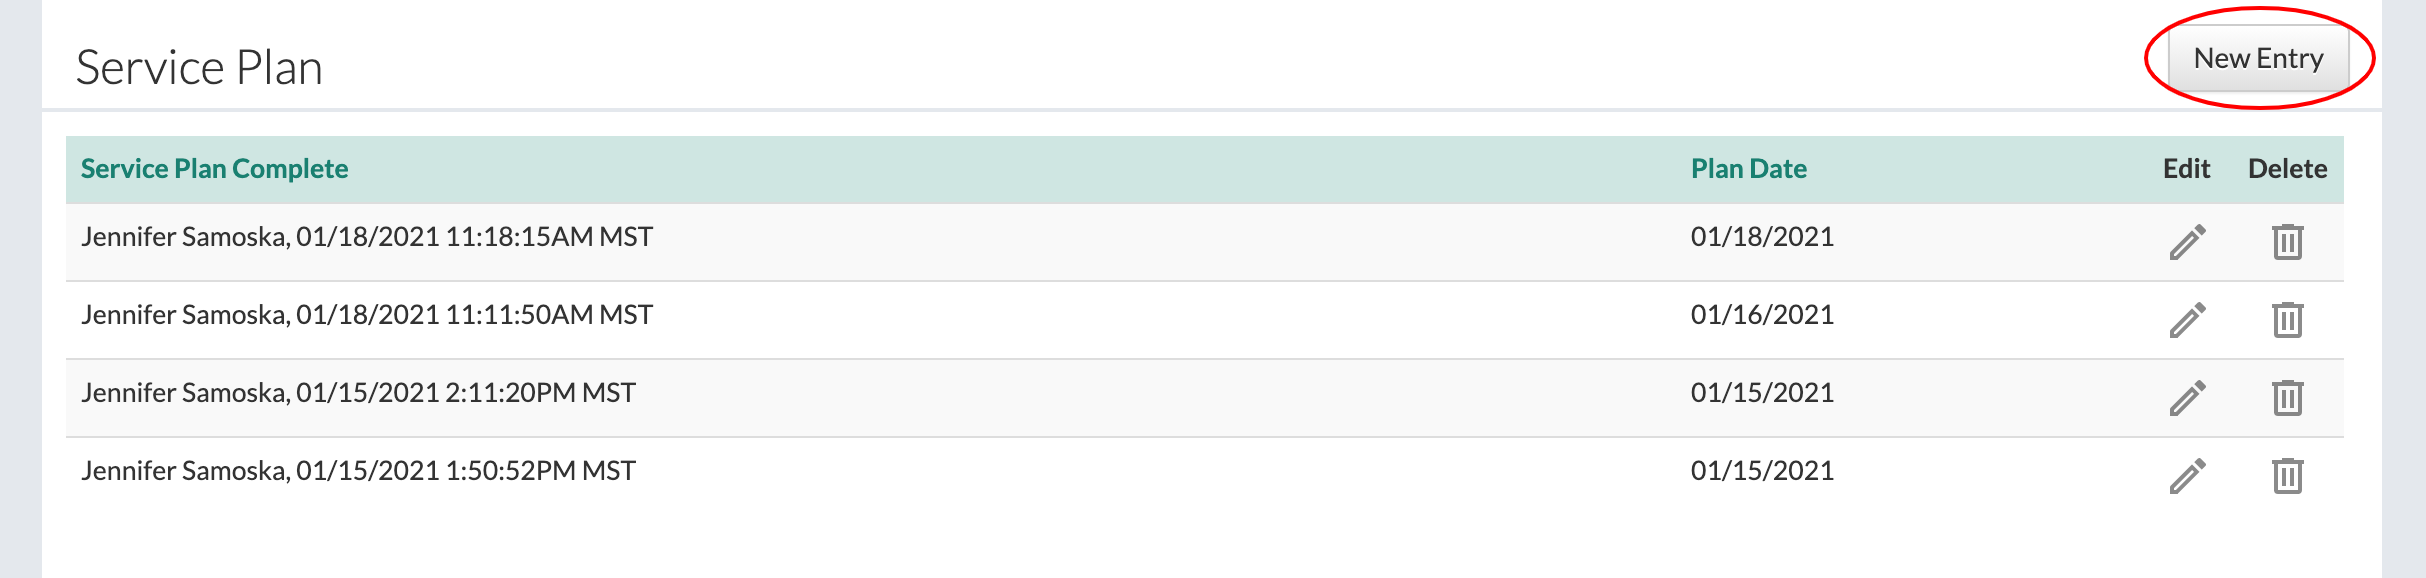
  1. Click on "Community Record" under the "Community" tab.
  2. Click on "Setup: Service Items" under "Care" under the "Setup" dropdown.
  3. Find the Service Category to add Vital Signs to.
  4. Select "Allow Vitals to be Selected" in the "Vital Signs" field in the desired Service Category.
  5. Click the "Save" button to finish.

Create a New Service Plan

Note that enabling adding Vital Signs will be reflected on ADLs going forward, ADLs created in the past will not be effected. That's why it's important to create a new Service Plan once enabling adding Vital Signs.

  1. Click on "Select Resident" under the "Resident" tab.
  2. Select a resident.
  3. Click on "Service Plan" under the "Nursing" dropdown.
  4. Click the "New Entry" button.
  5. Fill out the form.
    1. For each Service Category that needs to have Vital Signs included, click on the "Vital Signs" button for that category.
    2. Select the necessary Vital Sign(s) to be included with the Service Category.
  6. Click the "Save" button to finish.

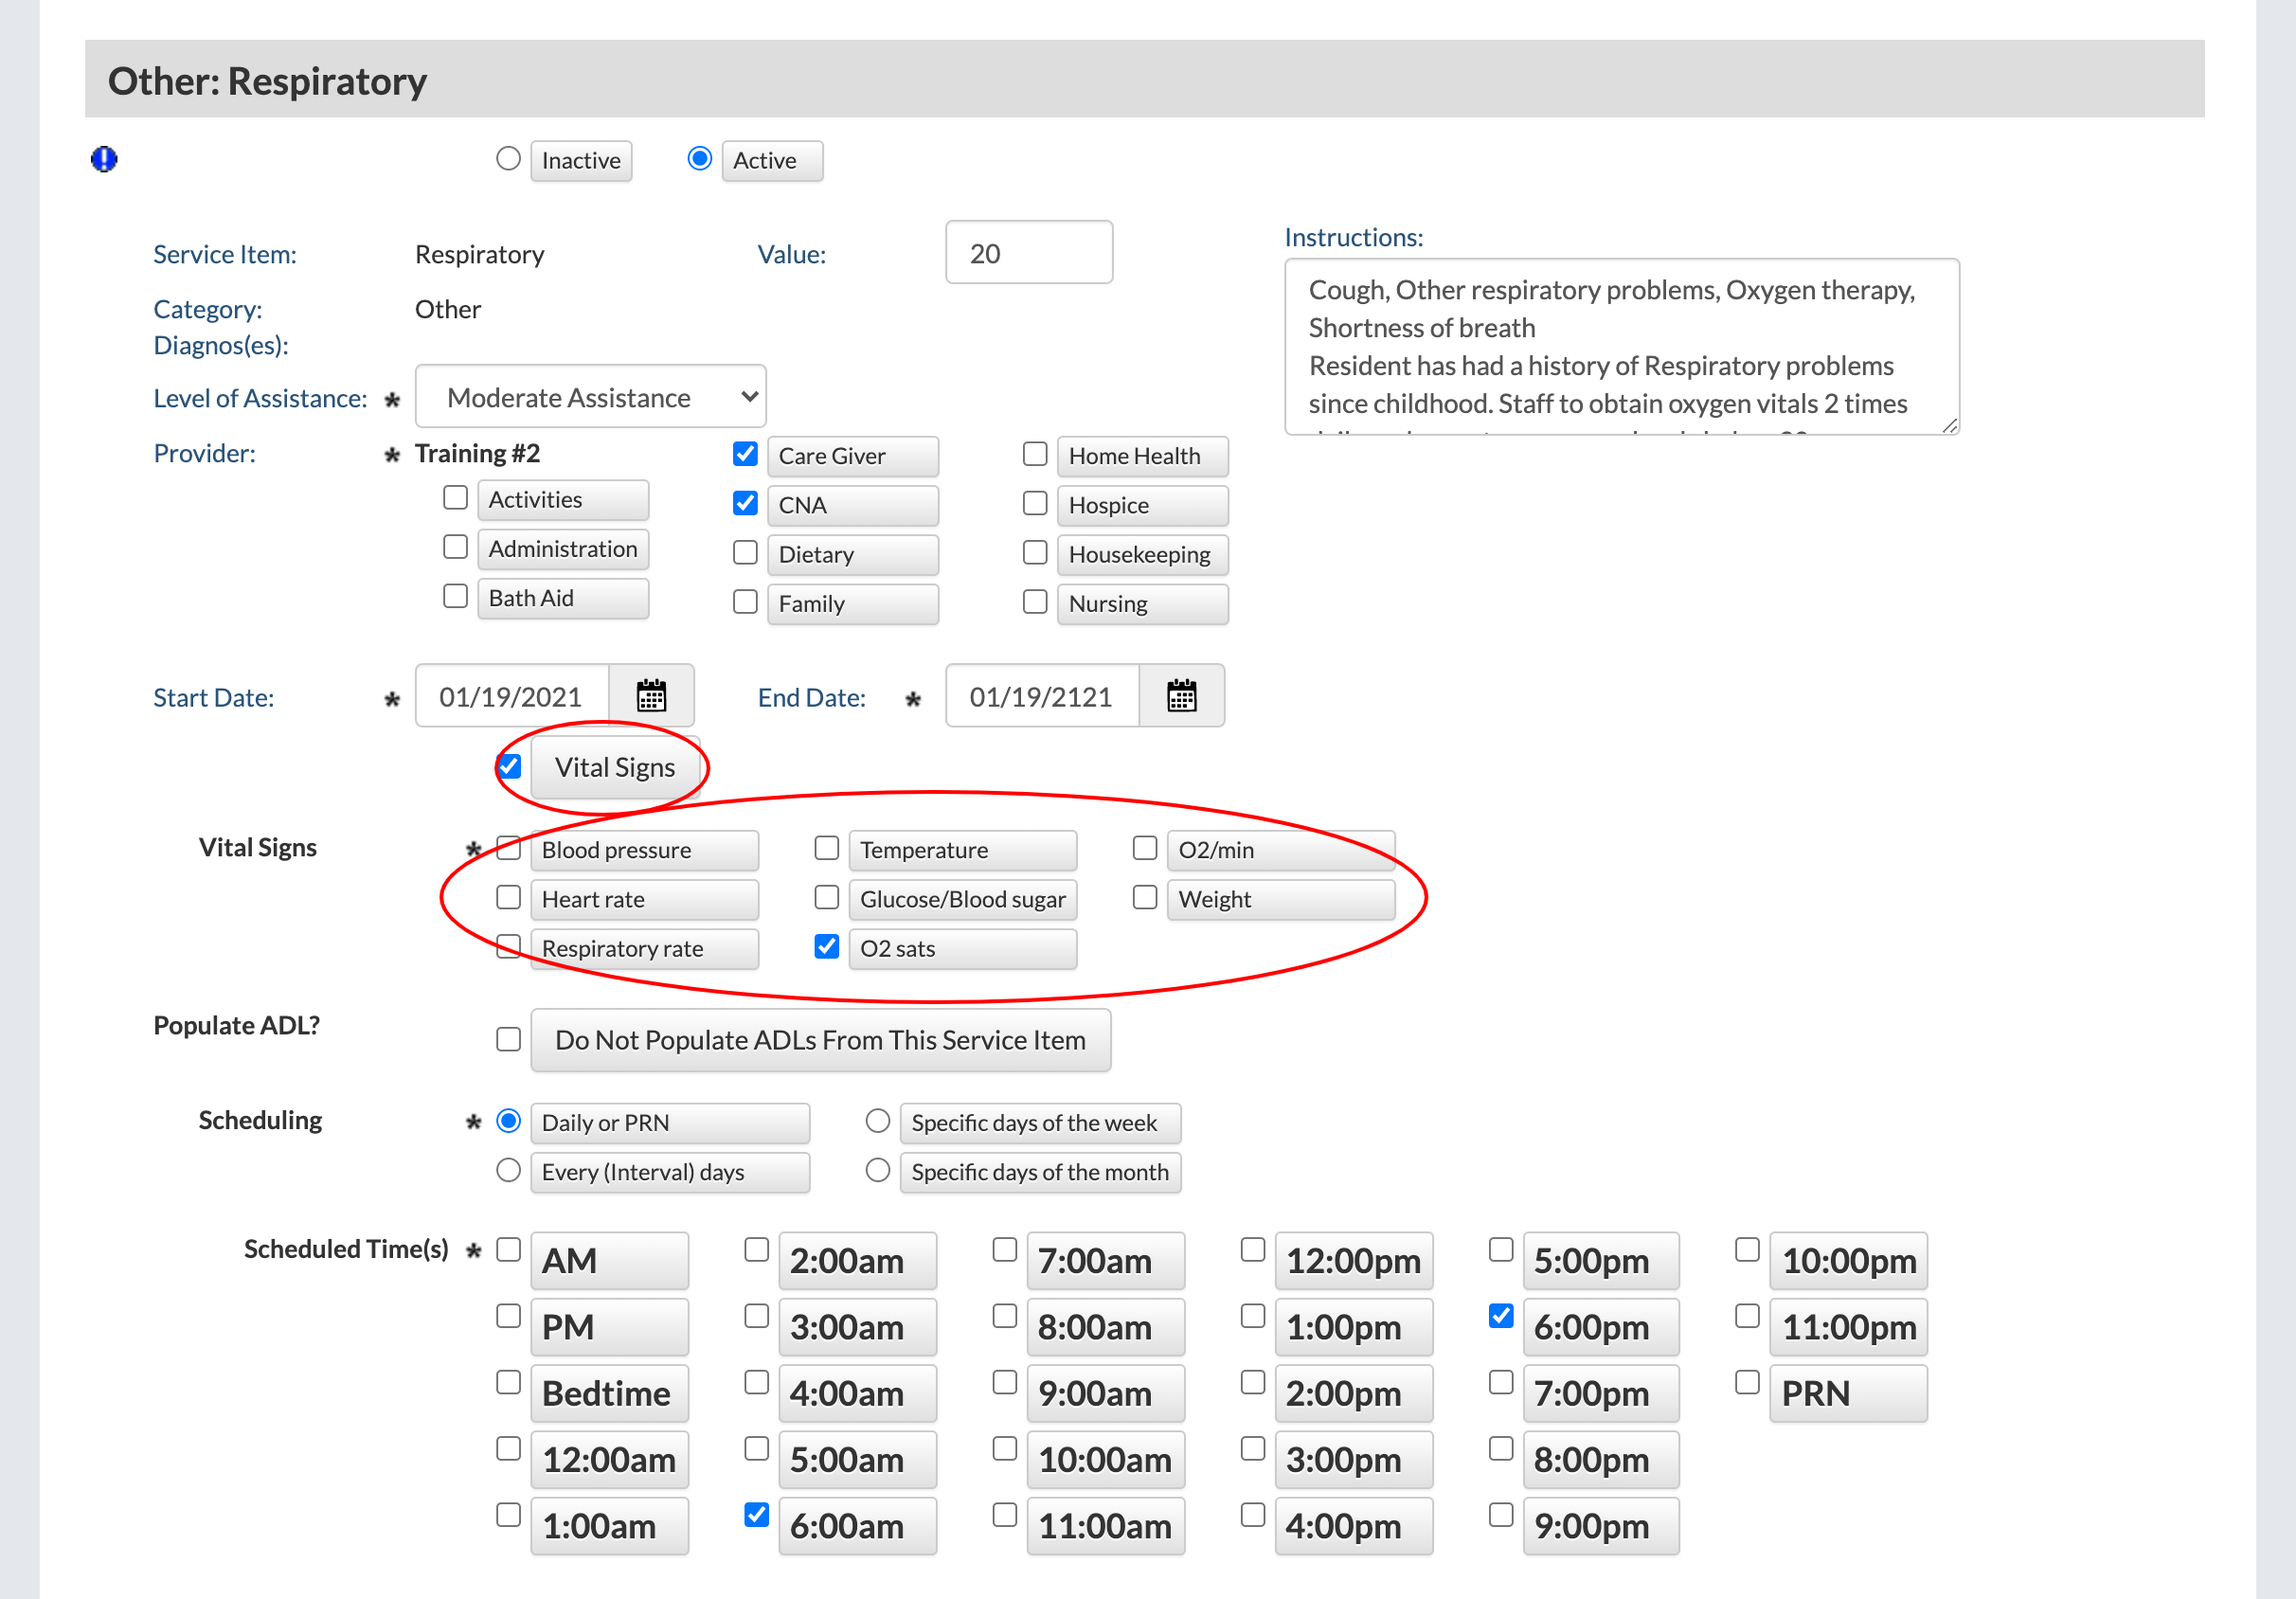
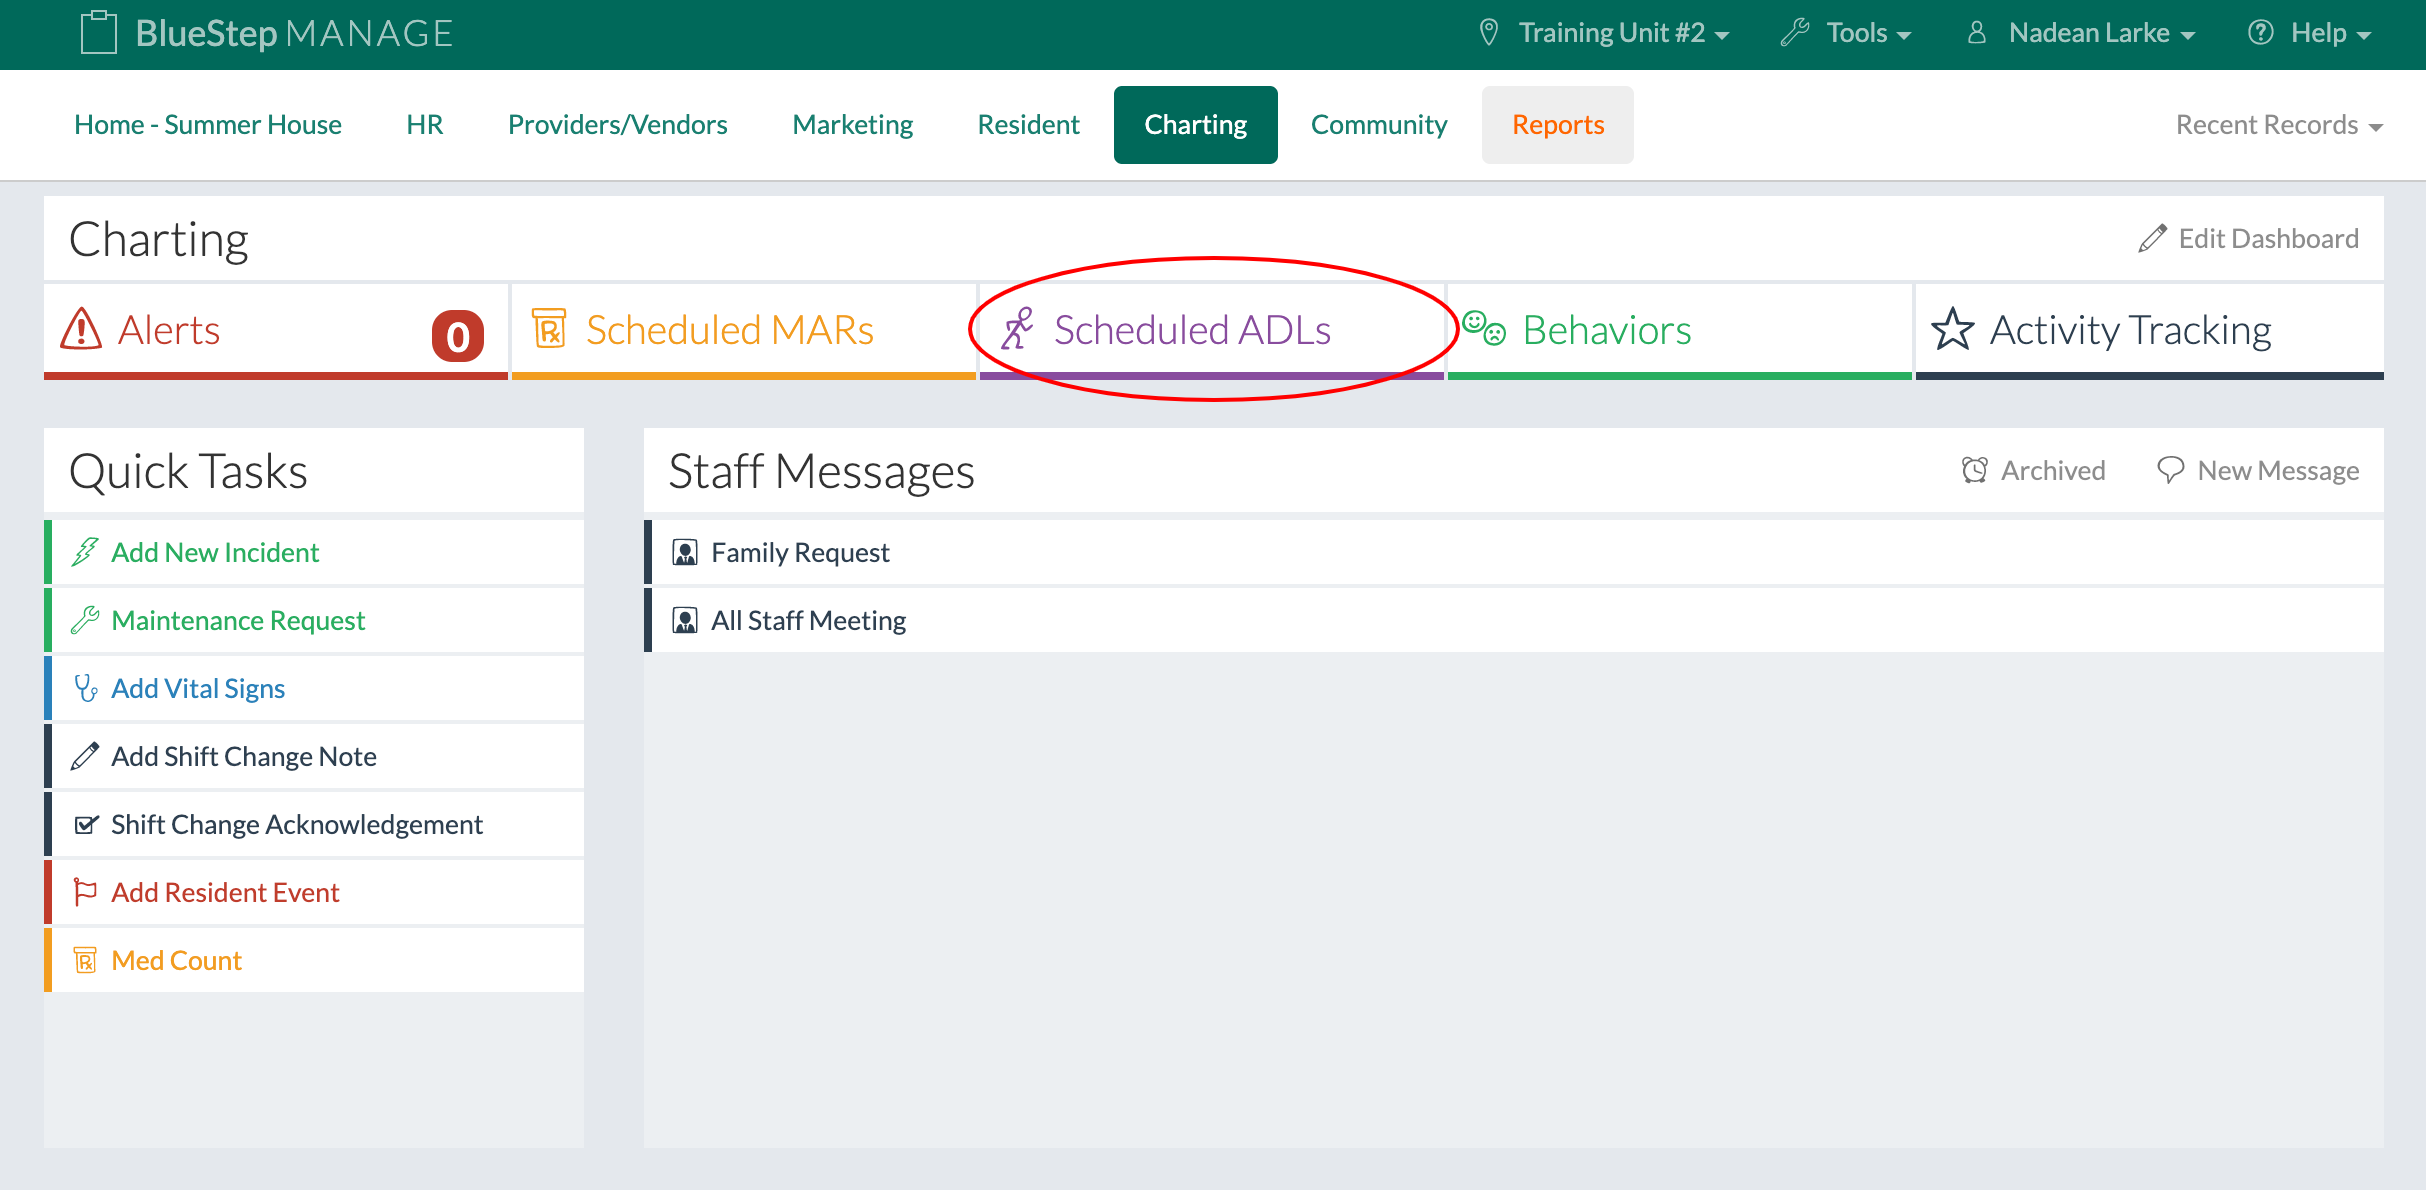
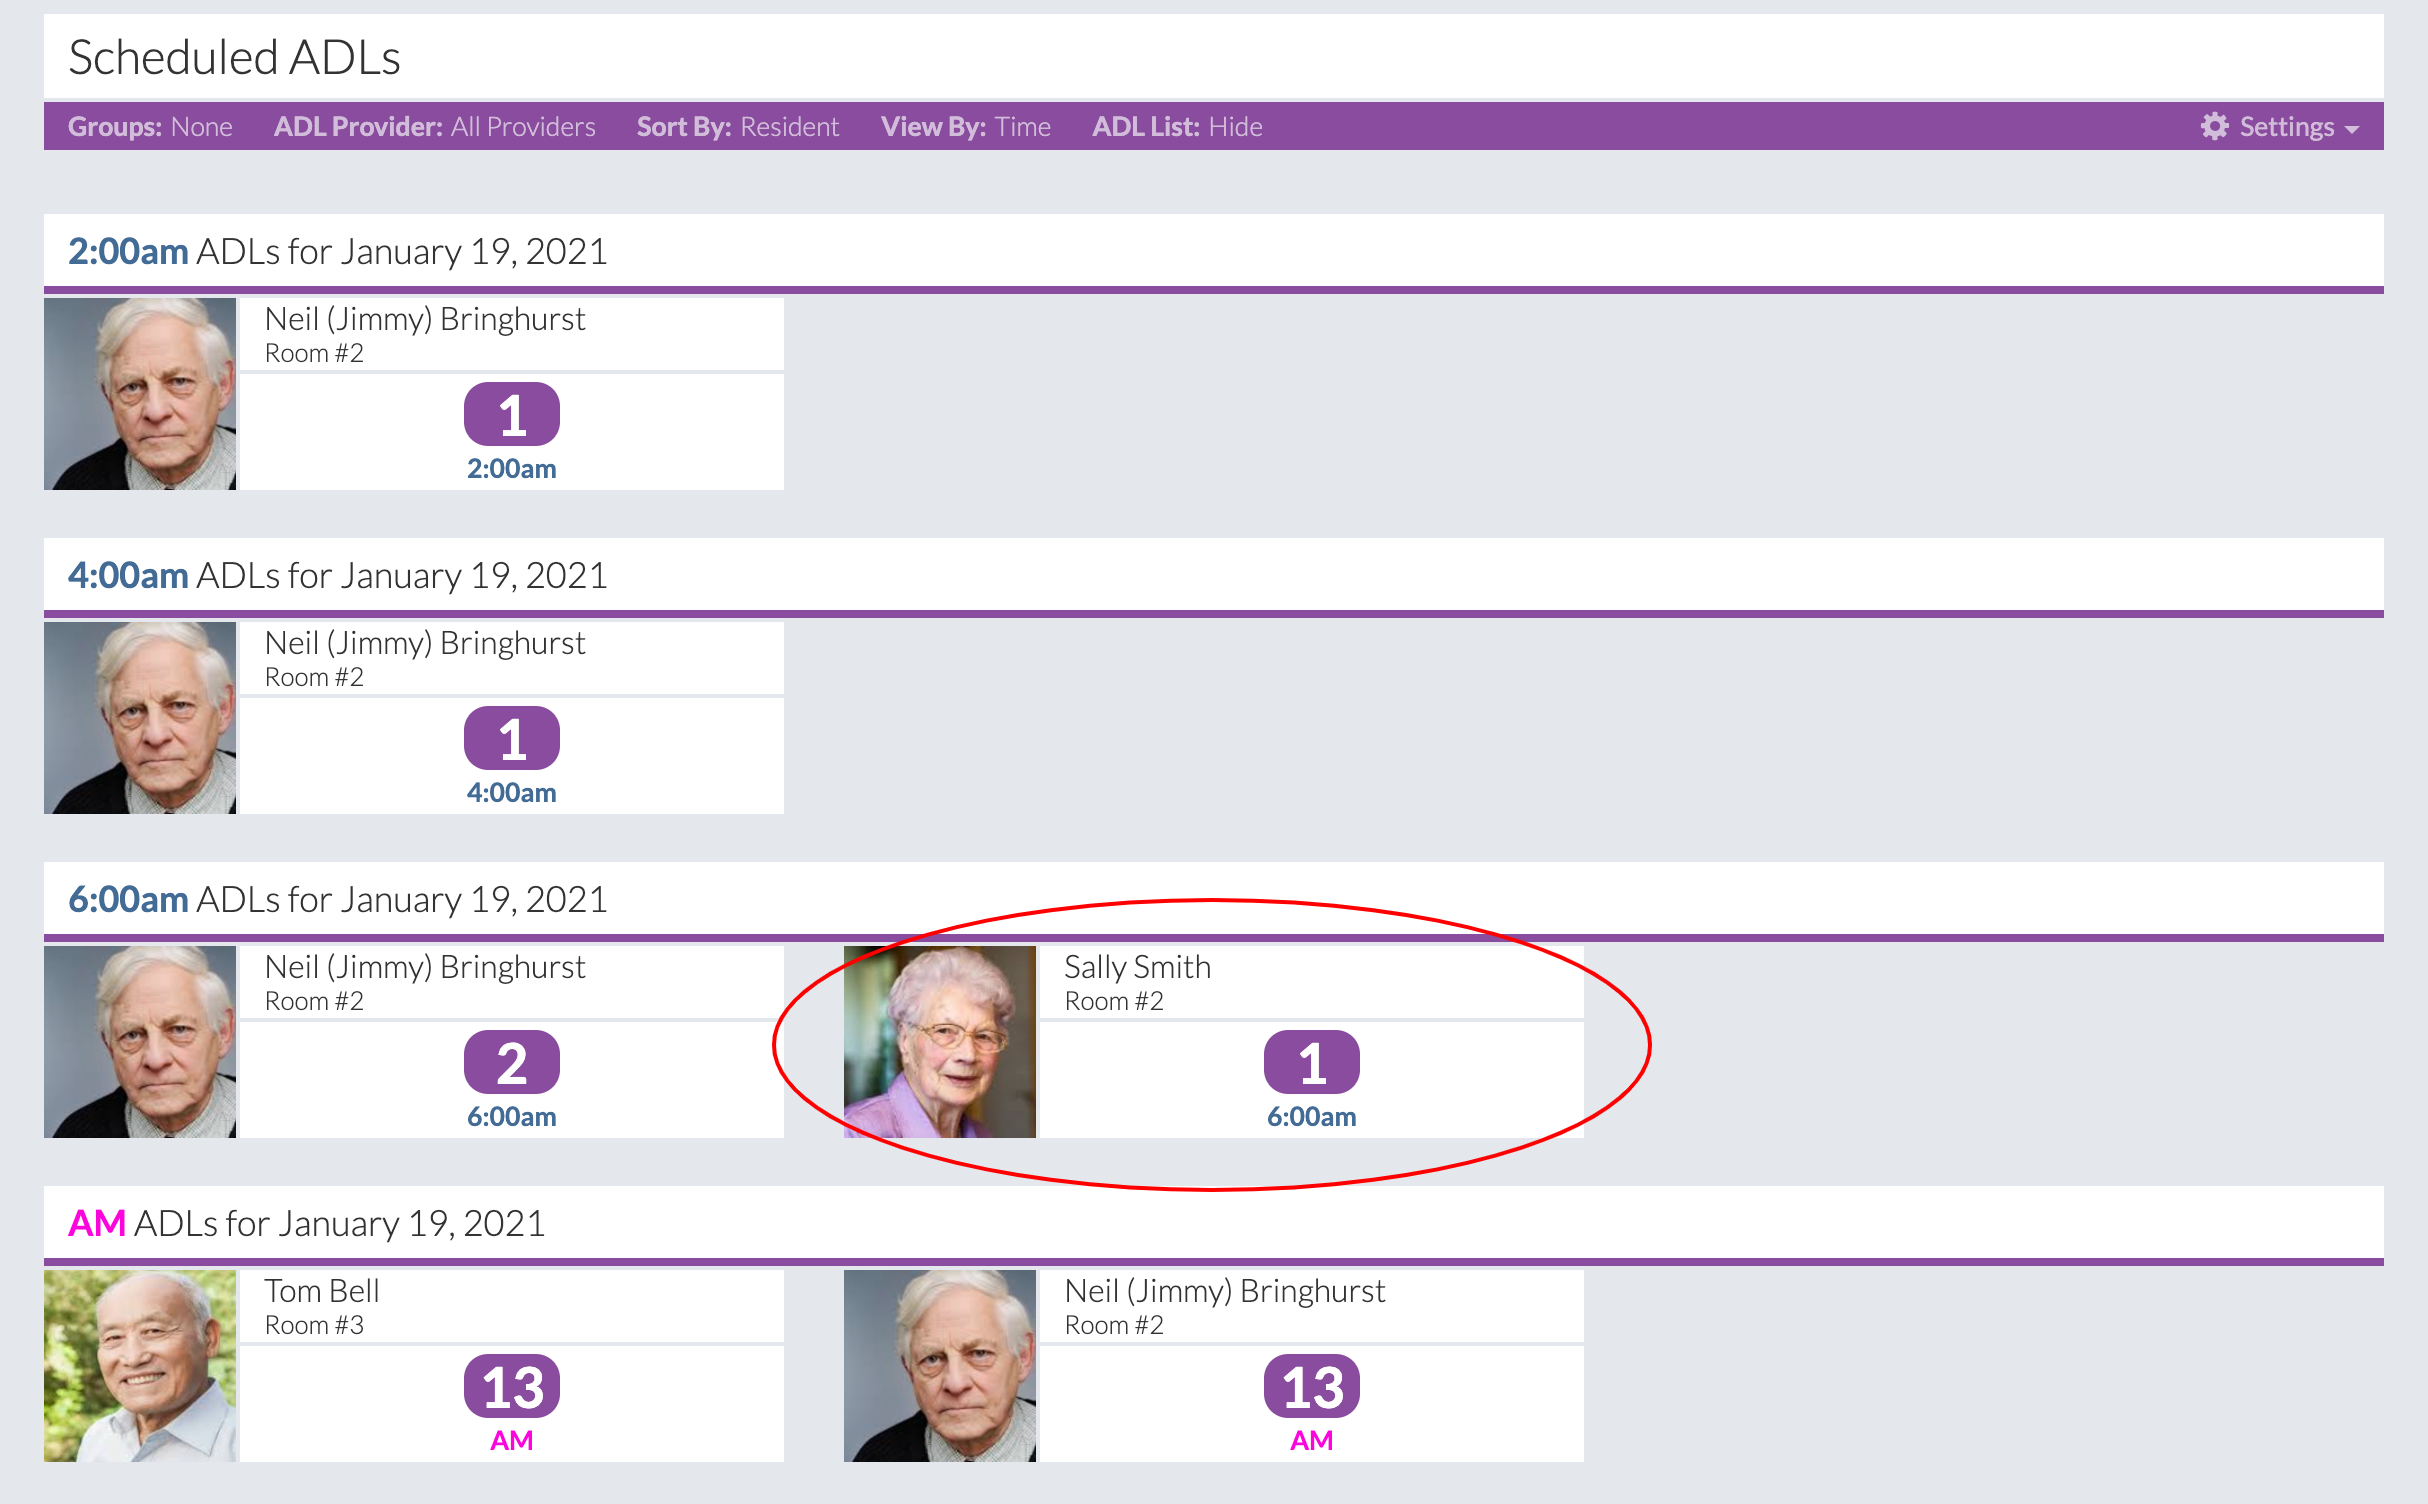
Enter a Vital Sign on an ADL through the Charting Page

  1. Click on "Charting" under the "Charting" tab.
  2. Click the "Scheduled ADLs" tab.
  3. Select an ADL whose Service Category has been set up to include Vital Signs.
  4. Enter the Vital Sign(s) directly onto the ADL.
  5. Click the "Save" button to finish.

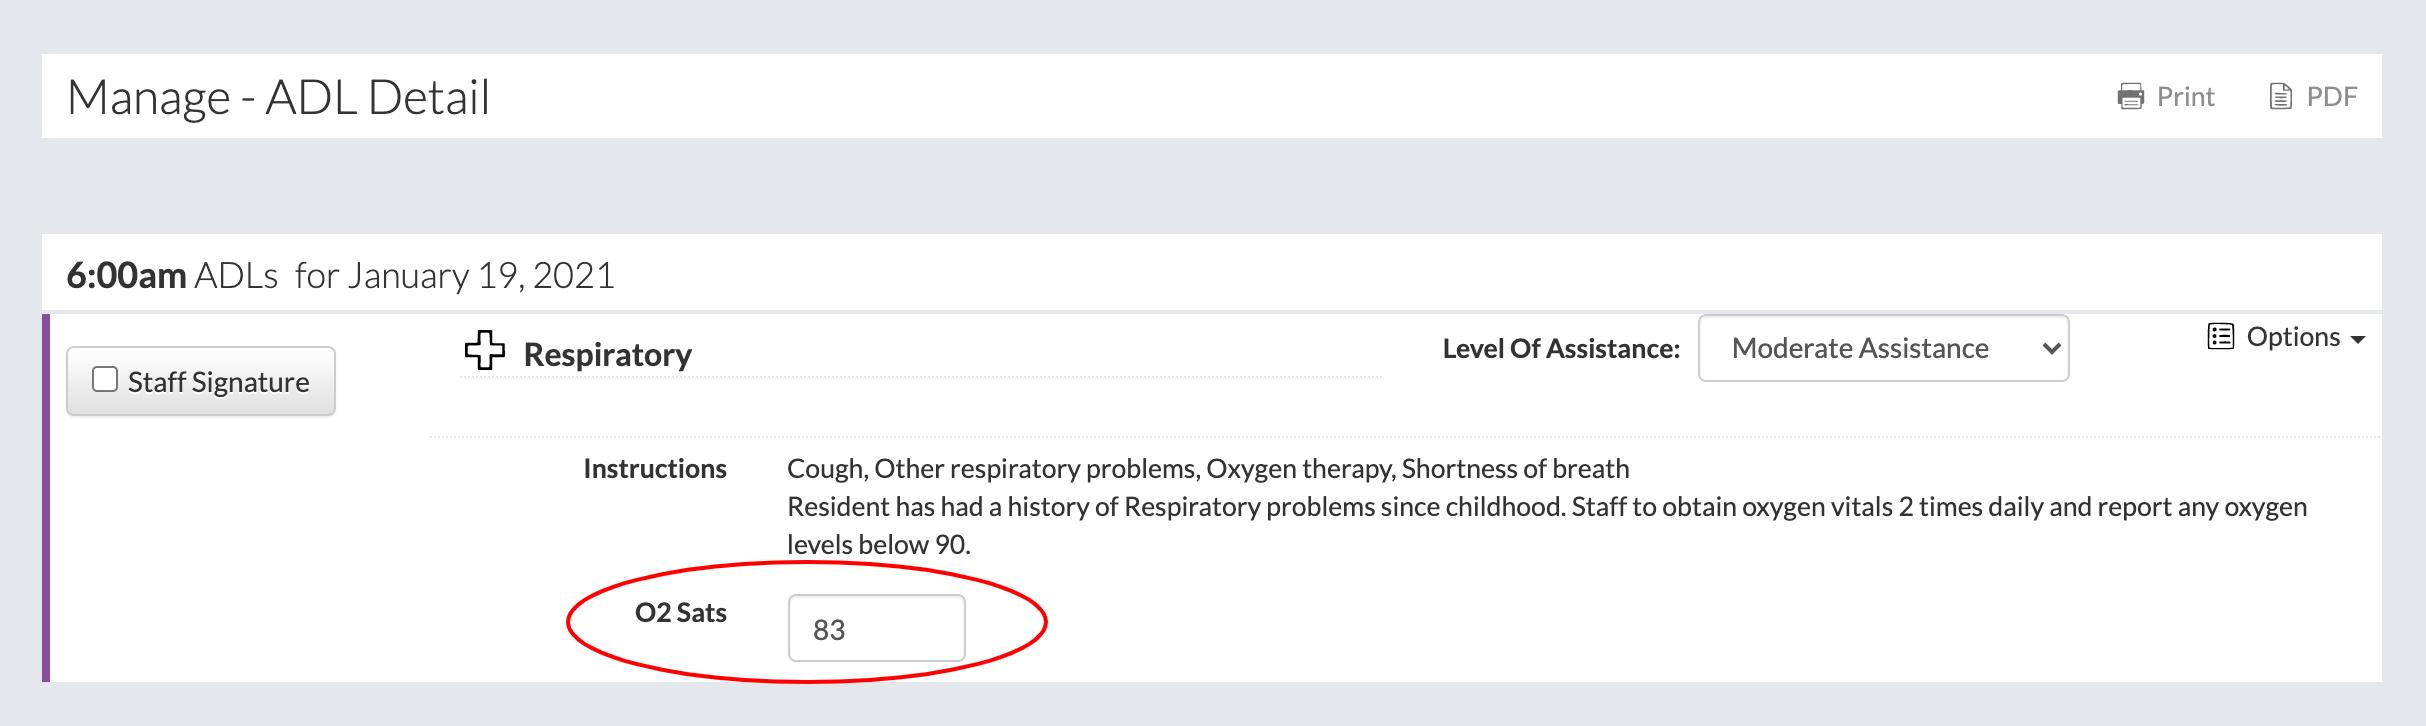
Any Vital Sign entered on an ADL will trigger any Vital Signs alerts that are set up in the community, it works the same as if the Vital Sign were entered on the Vital Signs form.

View Vital Sign Information on the ADL Report

  1. Click on "Resident Reports" under the "Reports" dropdown.
  2. Click on the "ADL (Search)" link.
  3. Any Vital Sign entered on any ADL will be displayed in the "Information" column.